

[ad_1]
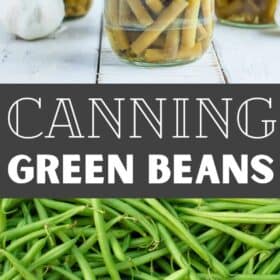

Observe this step-by-step tutorial to be taught The best way to Can Inexperienced Beans in a strain canner safely. One of many best canning recipes round, you’ll love having jars of residence canned inexperienced beans to make use of all yr lengthy.
As an Amazon Affiliate, I earn from qualifying purchases.
Summer season means beautiful and ample contemporary produce! Whereas contemporary inexperienced beans are unimaginable, pressure-canning inexperienced beans will let you take pleasure in all of them yr lengthy.
It’s an easy and easy course of. Let me maintain your hand and stroll you thru it.
When you have leftover contemporary inexperienced beans, strive your hand at making Cheesy Green Bean Casserole, Refrigerator Dilly Beans, Green Beans in Tomato Sauce, Garlic Butter Green Beans, Air Fryer Green Bean Fries, or Stir-Fried Green Beans.
The best way to Can Inexperienced Beans
*I’ll stroll you thru it right here with some photographs and ideas, and also you’ll additionally discover a printable recipe card on the backside of the submit with actual measurements, and many others. It’s also possible to click on “bounce to recipe” to skip down.
Begin with inexperienced bean pods which might be tender and full however not overly mature. You don’t need to have the ability to see the beans bulging by the pod; these will produce powerful and unappetizing canned inexperienced beans.
Rinse the beans in cool water, discarding any diseased or overly mature pods. Subsequent, you’re going to “snap” the beans to take away the ends and strings. You are able to do this by hand, or utilizing a knife. Professional tip: the knife technique is usually sooner, however I’ve seen that the minimize ends will brown within the jars just a few months after canning. They’re nonetheless suitable for eating however hold it in thoughts if the ultimate look is necessary to you.
You may depart the de-stringed beans complete or minimize them into 1-inch items. The dimensions often relies on the way you need to use them as soon as they’re canned.
Wash and clear your jars. It’s not essential to sterilize jars earlier than canning (hurray!) however it’s best to make certain they’re preheated sufficient to not crack when positioned in sizzling water.
You may put them in a clear dishwasher and run them by a fast wash cycle, or place them in a big pan with some water in a low-heat oven (my oven’s lowest temp is 170˚F) till you want them. I’ve even simply put sizzling faucet water in them earlier than and left them on the counter.
Wash your lids with sizzling soapy water and place them in a clear bowl for now.
In case you are doing the new pack technique (see beneath), add the inexperienced beans to a pot of boiling water and allow them to cook dinner for five minutes. In case you are doing the uncooked pack technique, enable 8 (ish) cups of water to come back to a boil in a pot or kettle.
Add 3 quarts of water to your pressure canner and put it on a burner set to excessive. Be sure that there’s a canning rack within the backside of the canner.
In case you are utilizing salt, add 1/2 tsp canning salt to pints and 1 tsp to quarts. Fill jars with inexperienced beans. You actually need to pack them in there. Professional tip: wiggle and gently faucet the jar in opposition to the counter typically as you add them to permit them to settle and make room for extra.
Utilizing a canning funnel, fastidiously and slowly add the clear boiling water, leaving 1 inch of headspace. Headspace is the space between the highest of the meals and the highest of the jar.
Utilizing an extended utensil (I choose a plastic chopstick), take away air bubbles from the jar.

Clear the rim of the jar very effectively with a sizzling damp rag. Any meals particles left on the rim could influence the seal of the lid within the canner.
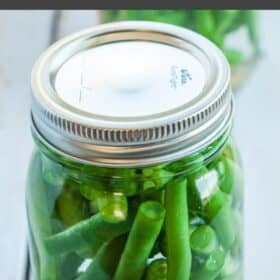
Place a clear lid on the jar. Add a hoop, and tighten it to fingertip tight.

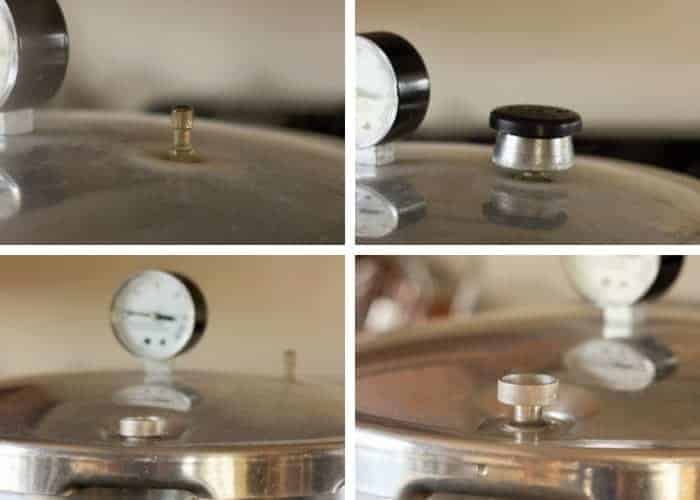
Utilizing canning tongs, gently place the jars within the canner. Lock the lid. Quickly, steam will begin coming by the vent pipe (I name it the steam chimney). Enable the steam to move by for about 10 minutes. Then put the strain regulator (I name it the chimney cap) on high. (see the 4 picture grid beneath for a visible of this course of step-by-step)
Fairly quickly, the air vent will pop up. That may be a signal that you simply’re beginning to construct strain contained in the canner (get excited. That is taking place!). Processing occasions will differ primarily based on altitude. See the charts beneath.
Strain Canning Inexperienced Beans in a Dial-Gauge Strain Canner
| Canner Strain (PSI) at Altitudes of | ||||||
| Model of Pack | Jar Dimension | Processing Time | 0-2,000 ft | 2,001-4,000 ft | 4,001-6,000 ft | 6,001-8,000 ft |
| Sizzling | Pints | 20 min | 11 lbs | 12 lbs | 13 lbs | 14 lbs |
| Quarts | 25 min | 11 lbs | 12 lbs | 13 lbs | 14 lbs | |
| *Source: National Center For Home Food Preservation | ||||||
Processing Time for Inexperienced Beans in a Weighted-Gauge Strain Canner
When the dial gauge reaches the suitable PSI, scale back the burner temp to medium, and begin your timer. The strain should keep on the PSA or (just a little bit) above in the course of the cooking time. You’ll doubtless want to regulate the temp on the burner just a few occasions relying in your range.
When the time is up, take away the canner from the burner and permit it to sit down till you hear a particular “click on” of the air vent dropping. Take away the strain regulator and thoroughly take away the lid of the canner (Professional tip: I all the time use oven mitts after I take the lid off as a result of the steam is tremendous sizzling).
Let the jars sit for five minutes within the canner with the lid off after which raise them out with canning tongs. Professional tip: permitting the jars to sit down within the canner with the lid off will help scale back the siphoning of liquid in your jars.
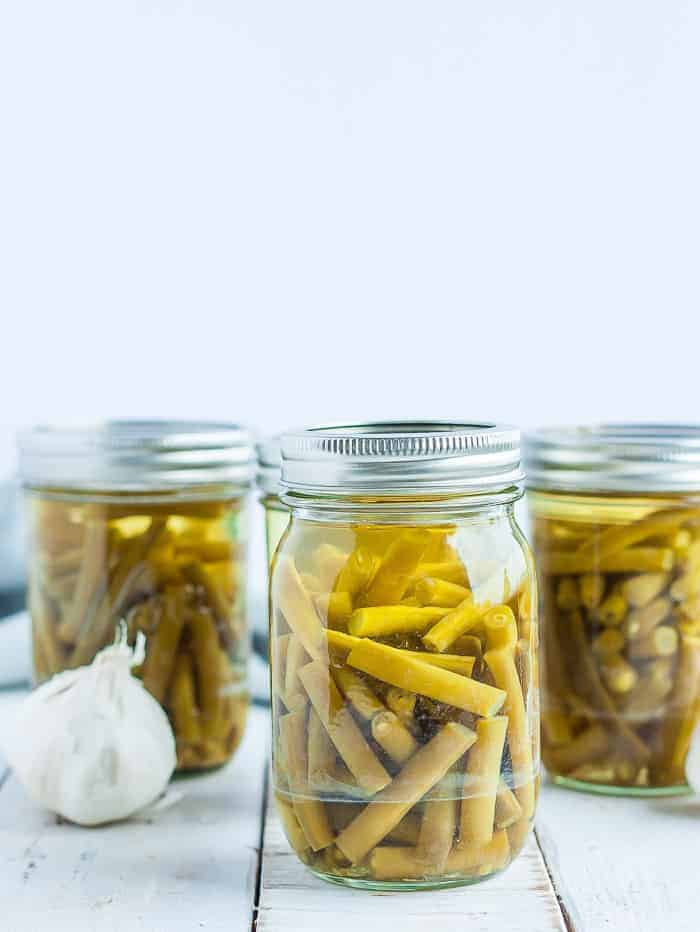
Place sizzling jars on a towel the place they’ll sit undisturbed for 12 hours.
After just a few hours, to test for sealing, gently press down in the midst of the lid. If the lid has no give, it’s sealed. Should you can press the lid in and it pops a bit, your jars should not sealed.
How Many Inexperienced Beans Do You Want?
A median of 14 kilos is required per canner load of seven quarts; a mean of 9 kilos is required per canner load of 9 pints. A bushel weighs 30 kilos and yields 12 to twenty quarts – a mean of two kilos per quart. (source)
Should you don’t have a big batch of beans to can without delay, you possibly can course of only a few jars if wanted. It will definitely does add up over the season! It’s also possible to be taught how to blanch and freeze green beans as a further solution to safely protect them.
Can You Can Inexperienced Beans in a Water Bathtub?
No, you can’t safely can inexperienced beans in a water bathtub canner.
Inexperienced beans, and all low-acid greens (like when canning beets, canning peas, canning potatoes, canning corn, or canning carrots), have to be preserved utilizing a strain canner.
The excellent news is that pressure-canning inexperienced beans could be very easy and simple to do.
Do You Prepare dinner Inexperienced Beans Earlier than Canning?
You may if you happen to choose beans with a softer texture. See notes beneath underneath “sizzling pack” directions if that’s your most well-liked packing technique. However it’s not obligatory to pre-cook them, and to save lots of time, select the chilly packing technique.
HOW LONG Will Residence CANNED Inexperienced Beans LAST?
If saved in a darkish cool place, home-canned inexperienced beans will final for 12 months.
RAW PACK FOR CANNING Inexperienced Beans
Uncooked packing (also called chilly pack or chilly packing) merely means inserting the beans within the jars with out precooking them, filling the jars with clear boiling water, after which strain canning them.
Uncooked packing is far sooner than a sizzling pack course of, however there are some drawbacks. Regardless of how effectively you pack the jars, the density of the veggies will change throughout their time within the canner.
This typically results in one thing known as “fruit float” wherein the produce will float to the highest of the jar, leaving water on the underside. You’ll discover this if you’re canning pears, canning whole tomatoes, and canning peaches as effectively. There’s nothing fallacious with it so long as your jars are nonetheless sealed.
HOT PACK FOR CANNING Inexperienced Beans
Sizzling packing entails cooking the inexperienced beans in boiling water for five minutes earlier than packing them into jars for canning.
The advantages of sizzling packing are that you simply sometimes can match extra per jar, and the close to elimination of fruit float. The disadvantage is I discover it makes the beans too mushy for my style.
Professional Ideas/Recipe Notes
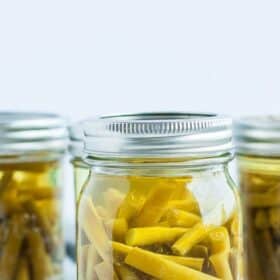
- The beans will change from a beautiful vivid inexperienced to a uninteresting inexperienced as soon as canned. That is regular they usually’re nonetheless suitable for eating.
- Siphoning is when liquid seeps out from underneath the lids and reduces the general quantity of liquid within the jar. If only a little bit of siphoning has occurred and your jars sealed, your merchandise remains to be suitable for eating however use your greatest judgment. I are inclined to rapidly use any jar that has skilled siphoning just because it may discolor the meals on the high not lined within the liquid.
- Strain canners can typically depart white strains on lids, rings, and jars (you’ll see it on my jars within the picture on the high of the submit). It’s completely regular and secure. To stop this, add 1/3 cup of white vinegar to the canner earlier than processing. I simply forgot to do it on this occasion. ?
MORE GREAT Preserving and CANNING RECIPES

The best way to Can Inexperienced Beans
One of many best canning recipes round, you’ll love having jars of residence canned inexperienced beans to make use of all yr lengthy.
-
Wash and clear your jars. Be sure that they’re preheated sufficient to not crack when positioned in sizzling water.
-
Wash your lids with sizzling soapy water and place them in a clear bowl.
-
Snap or minimize beans to take away any strings, and minimize into 1-inch items. Be aware: as soon as the string has been eliminated, you might also depart them complete if you happen to choose.
9 lbs inexperienced beans
-
(HOT PACK & COLD PACK INSTRUCTIONS) In case you are sizzling packing, add the beans to a pot of boiling water and allow them to cook dinner for five minutes. In case you are not sizzling packing, enable 8 (ish) cups of water to come back to a boil in a pot or kettle.
8 cups water
-
Add 3 quarts of water to the strain canner and put it on a burner set to high. Make sure there is a canning rack in the bottom of the canner.
3 quarts water
-
Add the beans to the jars. If adding salt, do that now. Tap the jar a few times to pack them in there as well as possible.
4.5 tsp canning salt
-
Using a canning funnel, carefully and slowly add the clean boiling water from the kettle/pot, leaving 1-inch of headspace. Headspace is the distance between the top of the food and the top of the jar.
-
Using a long utensil (I prefer a plastic chopstick), remove air bubbles from the jar.
-
Clean the rim of the jar very well with a hot damp rag. Any food debris left on the rim may impact the seal of the lid in the canner.
-
Place a clean lid on the jar. Add a ring, and tighten to fingertip tight.
-
Using canning tongs, gently place the jars in the canner.
-
Lock the lid. Soon, steam will start coming through the vent pipe. Allow the steam to pass through for about 10 minutes. Then put the pressure regulator on top.
-
Pretty soon, the air vent will pop up.
-
In a dial-gauge pressure canner, process pints and quarts based on the elevation guide below (see processing chart in post for altitude adjustments):*0-2,000f ft {PSI: 11 lbs of pressure} = Pints 20 min, Quarts 25 min*2,001-4,000k ft {PSI: 12 lbs of pressure} = Pints 20 min, Quarts 25 min*4,001-6,000k ft {PSI: 13 lbs of pressure} = Pints 20 min, Quarts 25 min*6,001-8,000k {PSi: 14 lbs of pressure} = Pints 20 min, Quarts 25 min
-
When the dial gauge reaches the appropriate PSI, reduce the burner temp to medium, and start your timer. The pressure must stay at the PSI or (a little bit) above for the duration of the cooking time. You’ll likely need to adjust the temp on the burner a few times depending on your stove.
-
When the time is up, remove the canner from the burner and allow it to sit until you hear a distinctive “click” of the air vent dropping. Remove the pressure regulator and carefully remove the lid of the canner (Pro tip: I always use oven mitts when I take the lid off because the steam is super hot).
-
Let the jars sit for 5 minutes in the canner and then lift them out with canning tongs. Pro tip: allowing the jars to sit in the canner with the lid off can help reduce the siphoning of liquid in your jars.
-
Remove with canning tons and place on a towel where they can sit undisturbed for 12 hours.
-
After a few hours, to check for sealing, gently press down in the middle of the lid. If the lid has no give, it’s sealed. If you can press the lid in and it pops a bit, your jars are not sealed.
Pints: Salt (optional) 1/2 tsp
Store in a cool dark place for 12 months.
Nutrition Facts
How to Can Green Beans
Amount Per Serving (1 pint)
Calories 141
Calories from Fat 9
% Daily Value*
Fat 1g2%
Saturated Fat 1g6%
Sodium 38mg2%
Potassium 957mg27%
Carbohydrates 32g11%
Fiber 12g50%
Sugar 15g17%
Protein 8g16%
Vitamin A 3130IU63%
Vitamin C 55mg67%
Calcium 174mg17%
Iron 5mg28%
* Percent Daily Values are based on a 2000 calorie diet.
Shop this Post:
(may include affiliate links)
[ad_2]
Source link


")


